But, they can't be redistribued for personal or commercial purpose.
© Copyright 2006 Dai Sato. All rights reserved.
|
Equipment: Canon 5D Sigma 8mm F4 EX DG Circlar Fisheye Sigma 15mm f/2.8 EX DG FISHEYE LENS f/CANON Kaidan Spherical Bracket with Quick Release Camera Mount Kaidan QuickPan Rotator Base Software: PTGui Photoshop |
|
|
|
Basically, it is the same to make a panorama HDRI with making chrome ball one. First, shoot photos with different exposures, and patch them to panorama pictures (you can find many how-tos on the web, if you google it). Then, convert them to a panorama HDRI with Photoshop: File > Automate > Merge to HDR. In case you want to create hi-res one, you may need some memory on your pc. |
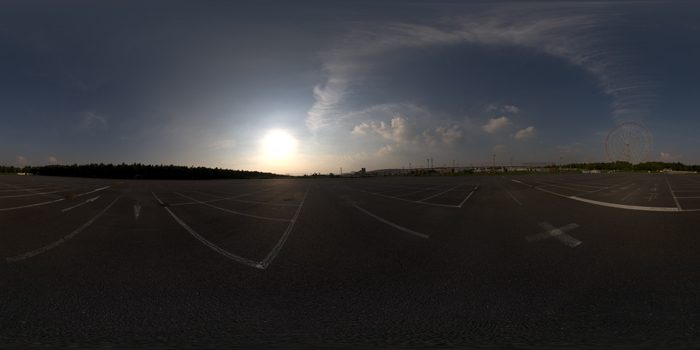 Parking_15mm |
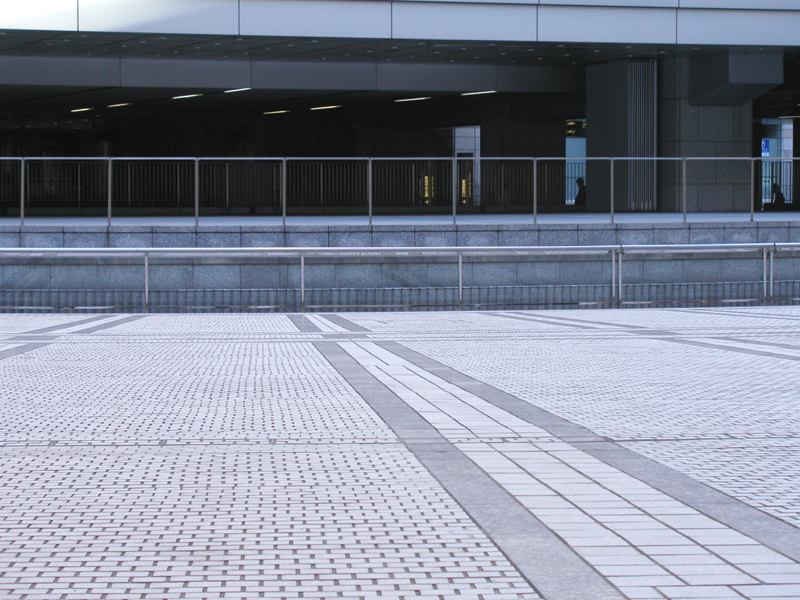
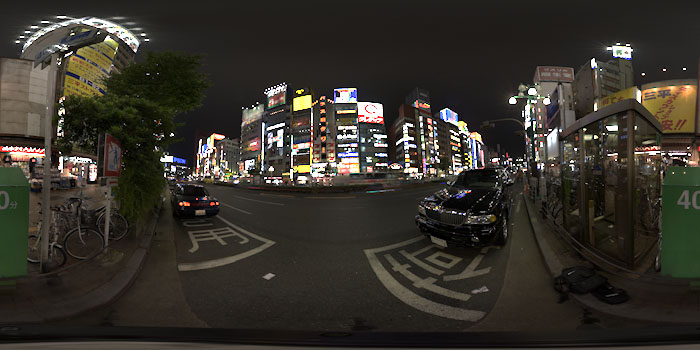 Kabukicyo_15mm |
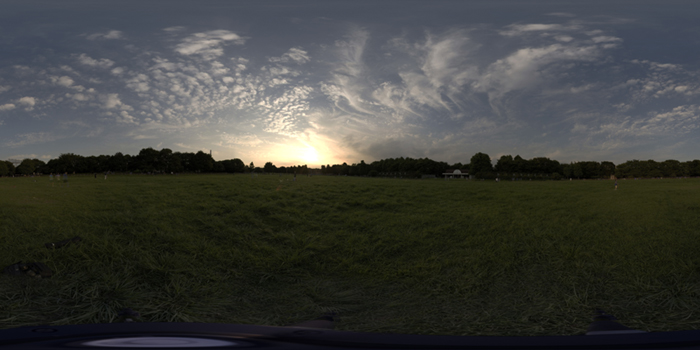 Hikarigaoka_PartII_15mm 11050*5525 |
Lighting with HDRI
Basically, it is a tough work to fit CG object
with Photograph naturally even if you spend hours on changing light property or material setting.
However, with HDRdomelight(max script) or HDRI lighting
of GI rederer like finalRender or Brazil,
you can easily do that work, and save time.
with Photograph naturally even if you spend hours on changing light property or material setting.
However, with HDRdomelight(max script) or HDRI lighting
of GI rederer like finalRender or Brazil,
you can easily do that work, and save time.
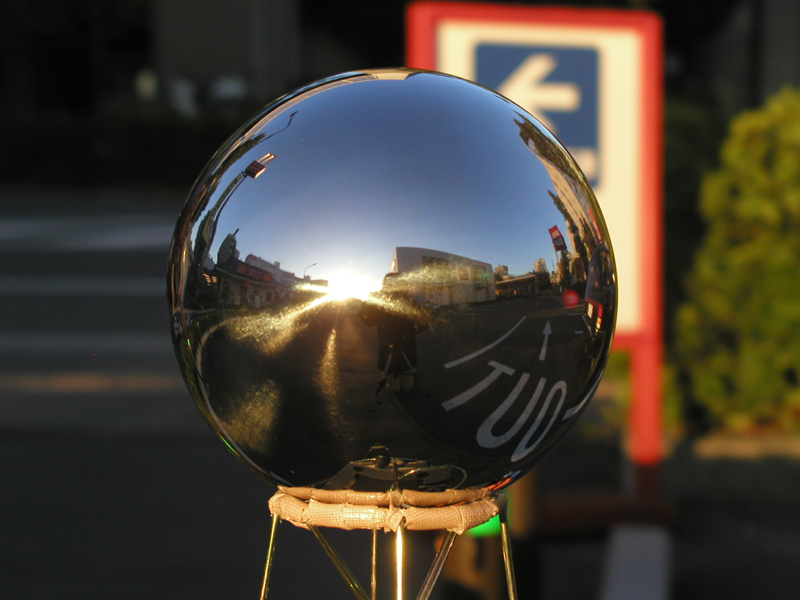 |
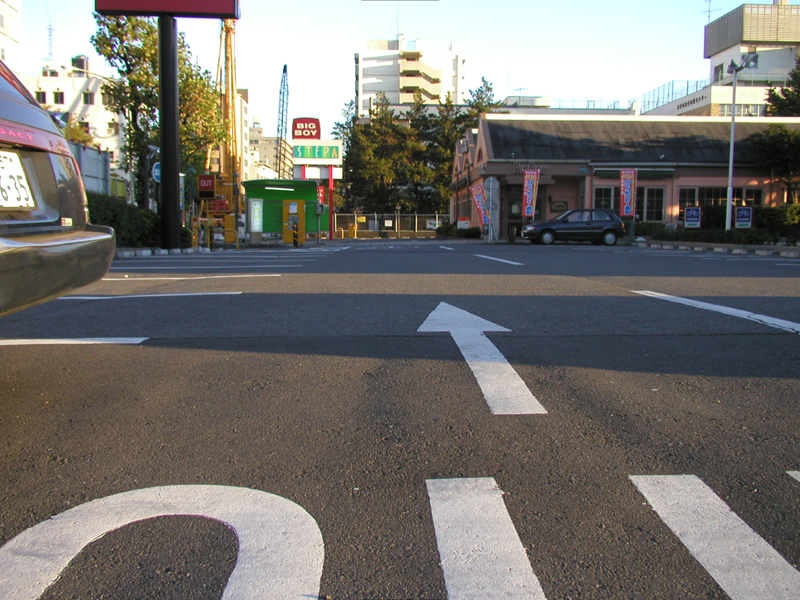
First, you need a chrome or mirror sphere to get panoramic reflection and shoot photo of that to create HDRI. If you've got that, let's go out for shooting photos. I used digital camera(Olympus C4040Zoom) to shoot these photos. According toHDRShop's tutorial, to calibrate camera curve, theoretically two photos are enough. One inclueds brightest and darkest area, and the other includes medium bright are. But, usually four or five photos are used. First, set your digital camera to manual mode. Change shutter speed to about 1/150 and iris to F2 or F3. Try a shoot, then check if brightness of photo is good. If you got nice photo, then close iris to F10(this is the darkest iris setting of my cam). Then, shoot a photo with closing iris to F1-stop. By repeating that, you'll get 9 photos (F10,F9,F8,F7,F6,F5,F4,F3,F2). |
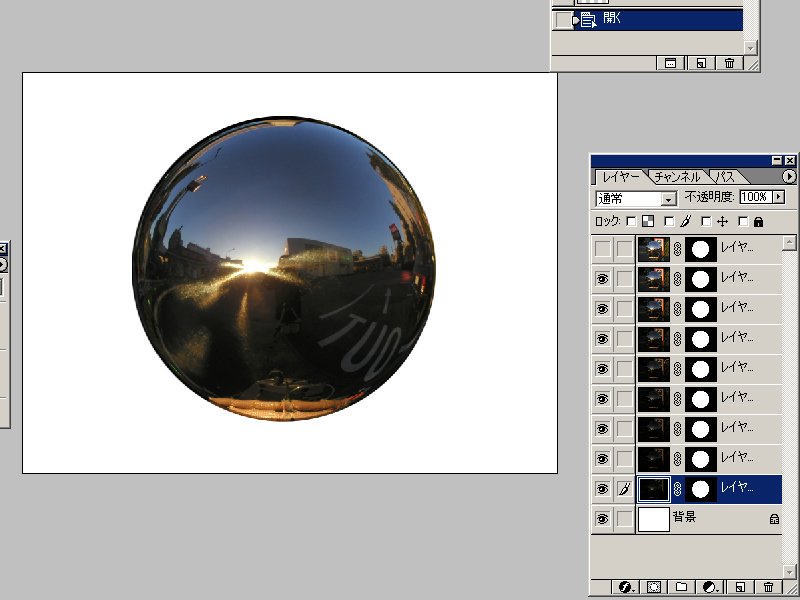 |
Next, load these photos to photoshop for modification. Usually a photo-taker in chrome ball should be erased, but I got no times this time, so let it be. Paste all photos as layers, and bring brightest one to top. If you have some gaps between them, use move tool and adjust them. Using heavy and stable tripod reduce these gaps. Finally, fill background with black, and trim this image to make it fit the size of sphere. |
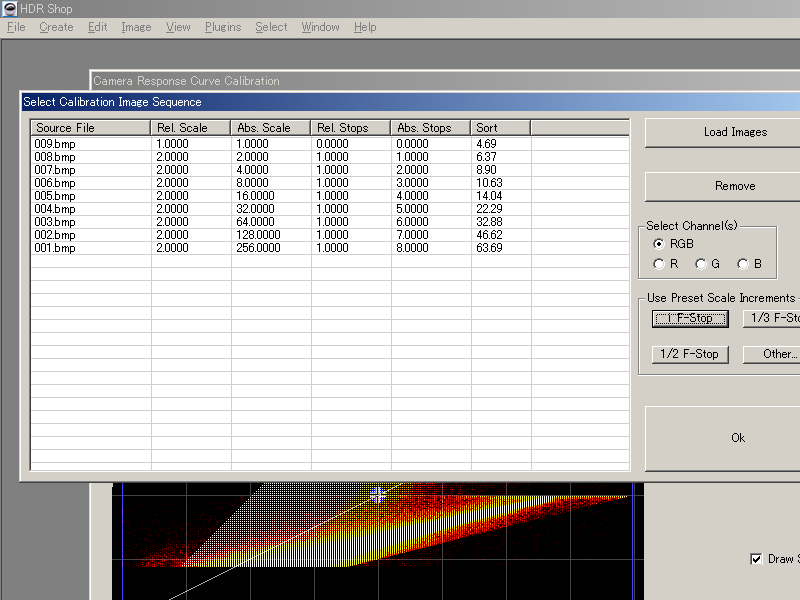 |
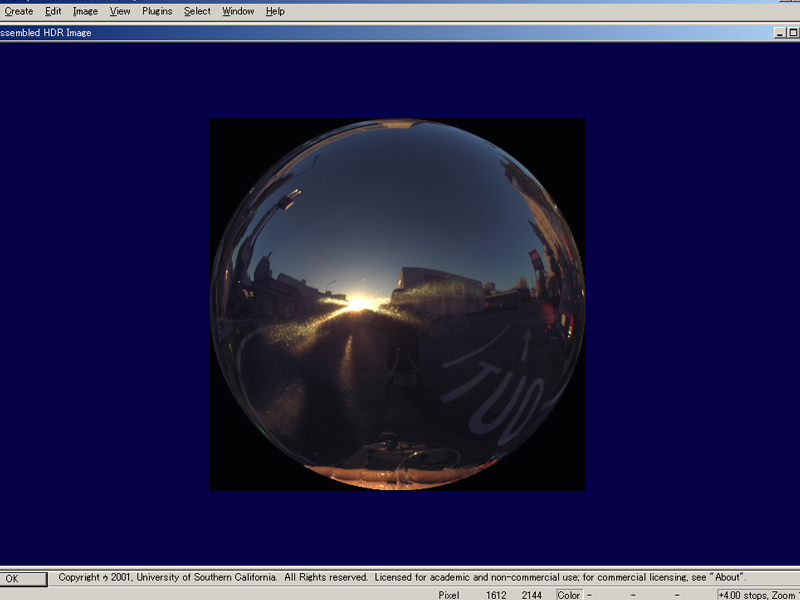
Open HDRShop, and go to "Create"-"Calibrate Camera Curve". Load nine photos, and set "Preset Scale Increments" to F1-stop. Press "Go" to begin calculation. Left picture shows these images are arranged according to each photo's total pixel value. |
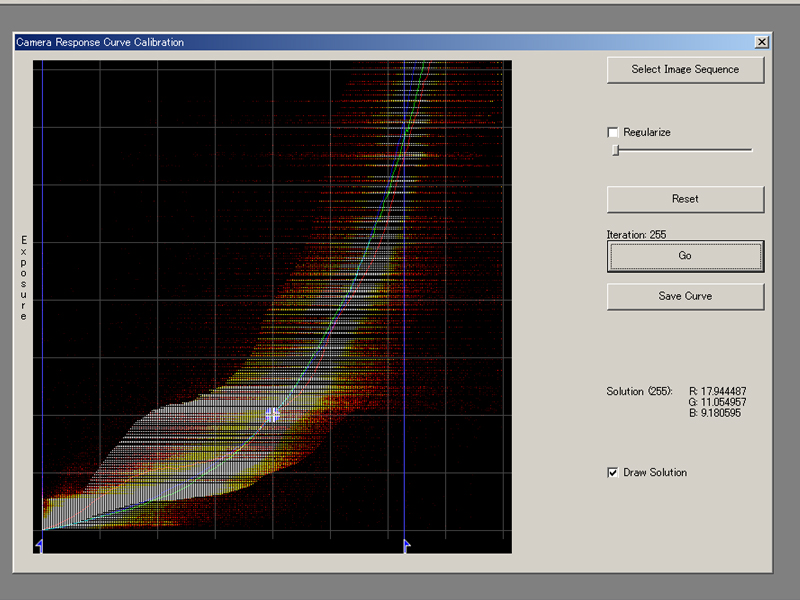 |
After graph seems to stop changing, press "Stop". Move blue arrow to ristrict graphs to remove overvalued part of it. And save this camera curve. |
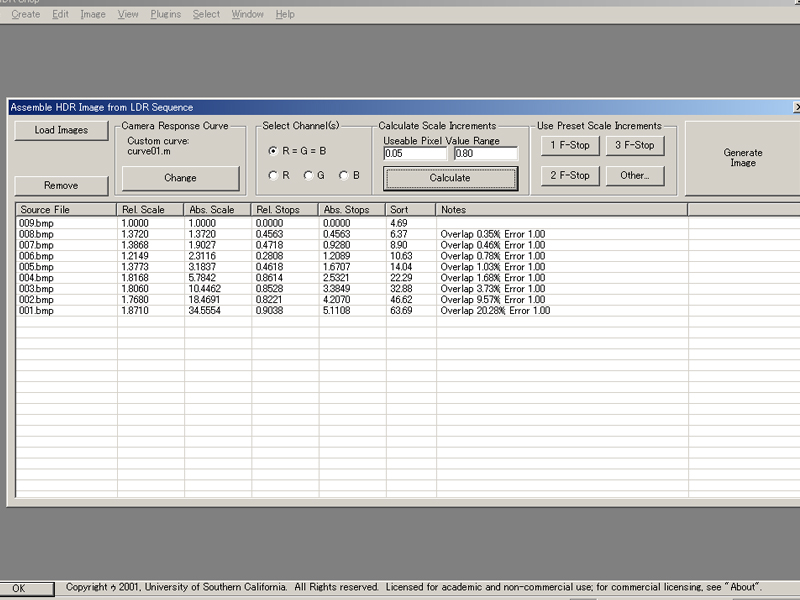 |
Next, go to "Create"-"Assemble HDR from Image Sequence". Press "Change", and "Custom Curve, then load camera curve you created. Press "Caluculate" to get exact scale incremetns from your camera curve. Finally, press "Generate Image". |
 |
That's all.
I assume you got HDRI now. If you got many oversaturated or overcolored pixels like blue or red one, you may failed to calibrate camera curve or modify photos. In this case, go back to former process, then check them. |
|
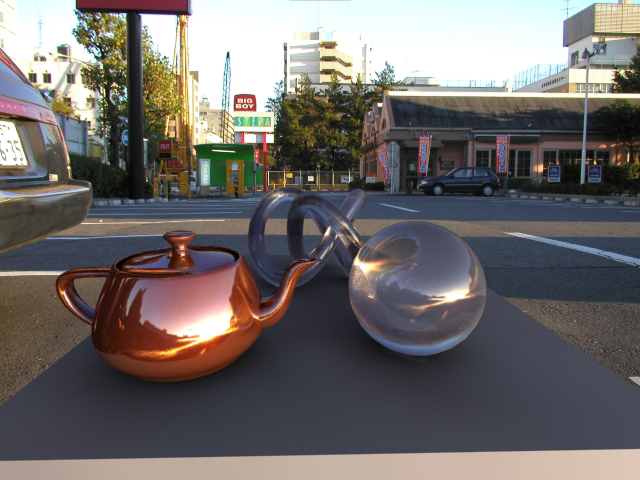
I createted test scene with simple objects and finalRender material. Although camera match's not done, and perspective of scene is adjusted manually, rendering output looks like real thing to some extent because of HDRI lighting. And, I put some HDRI including this one at links below. So, plz try and use them. |
|
|
|
|
|
|
|
|
|
|